
 Deutsch
NodeESP
Day 16: Universal Remote-Control
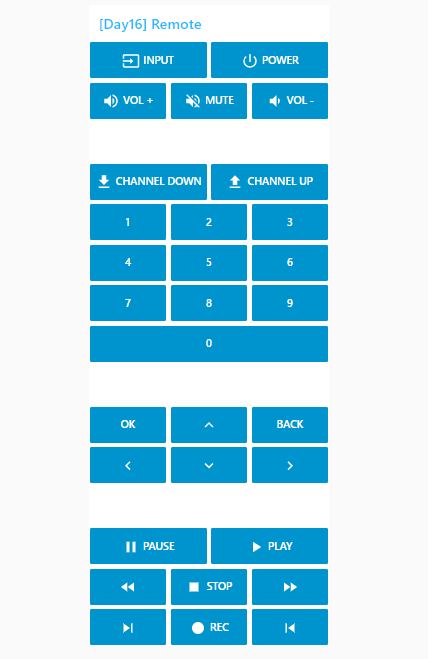
The door today reveals the counterpart to yesterday’s component, namely an IR diode. Now you can build a real remote-control for your TV and control it conveniently via smartphone and website. We will use the following setup. Select the program…
Read more
Day 15: Remote Control Receiver
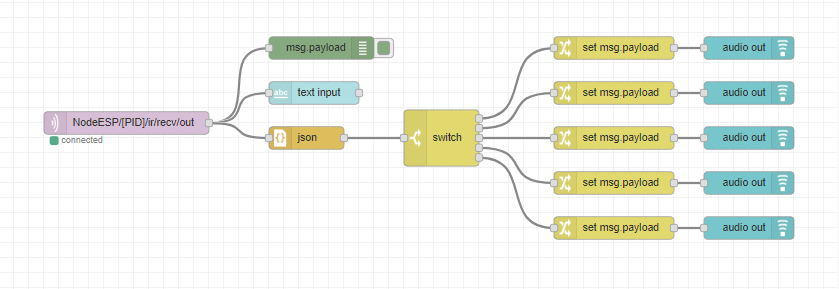
The door reveals a very special component today, namely an infrared receiver module. You can use it to 15. Tag receive customary infrared remote-control signals. We will use the following setup. After the circuit is set up, select today’s program….
Read more
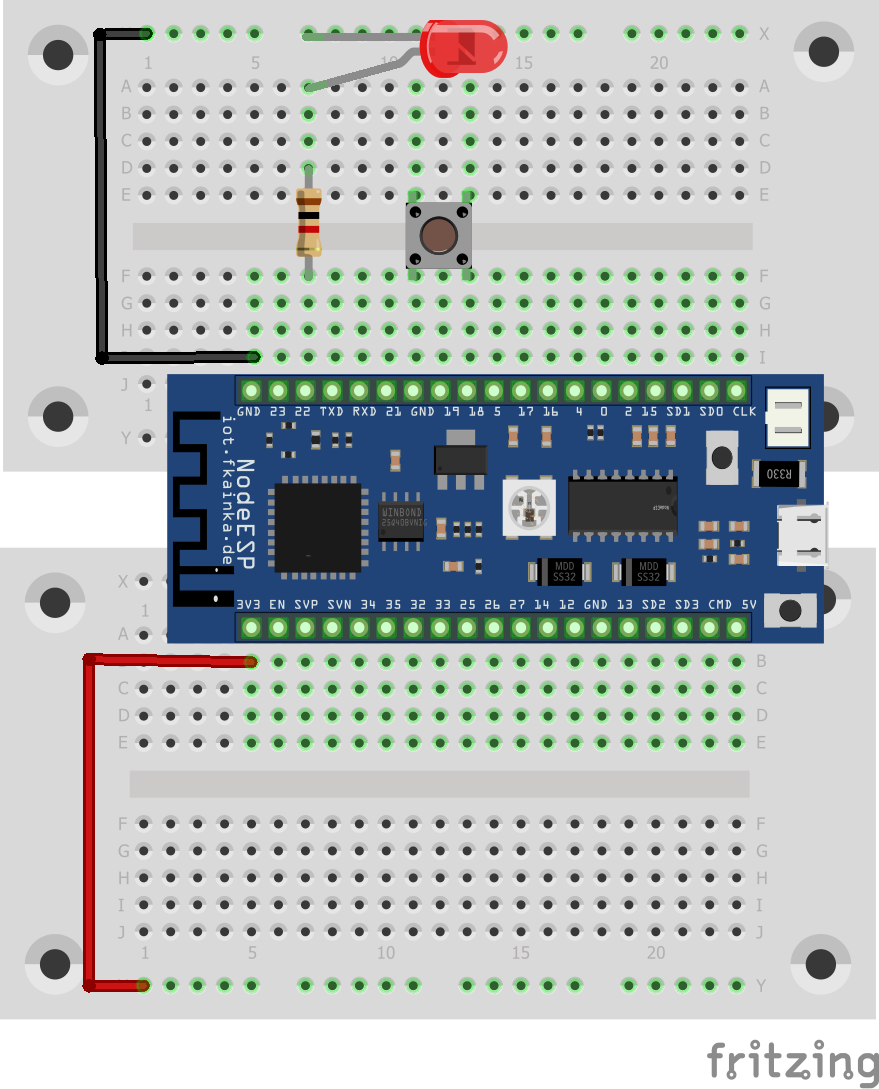
Day 14: Smart Lights
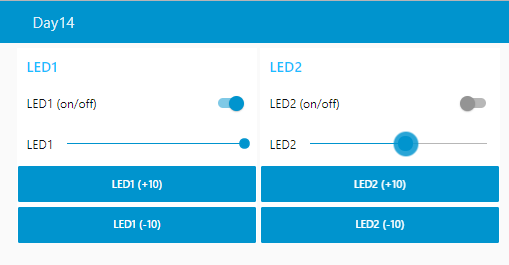
The door of day 14 reveals another LED. Now we have two LEDs with resistors and two buttons and 14. Tag cables, enough to build a complex lighting system. We will use the following setup: Enable today’s program and install…
Read more
Day 13: Smart Switch for Soundboard
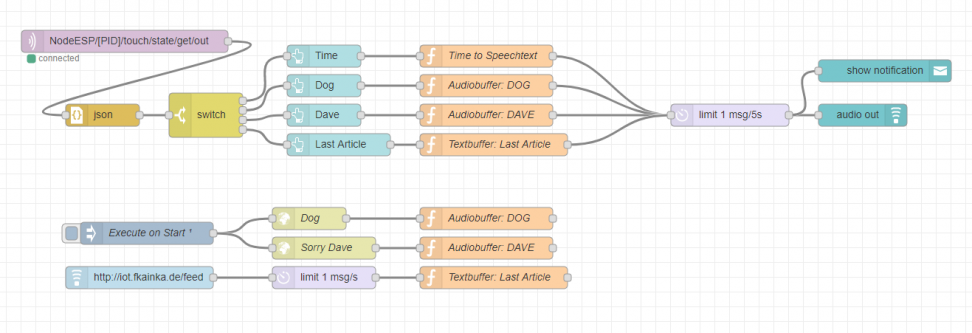
Today we will find again a 1 kOhm resistor hidden behind the door of the Advent calendar. But we are not going to use it today. Instead I would like to show you how you can build a smart touch…
Read more
Day 12: MQTT Button
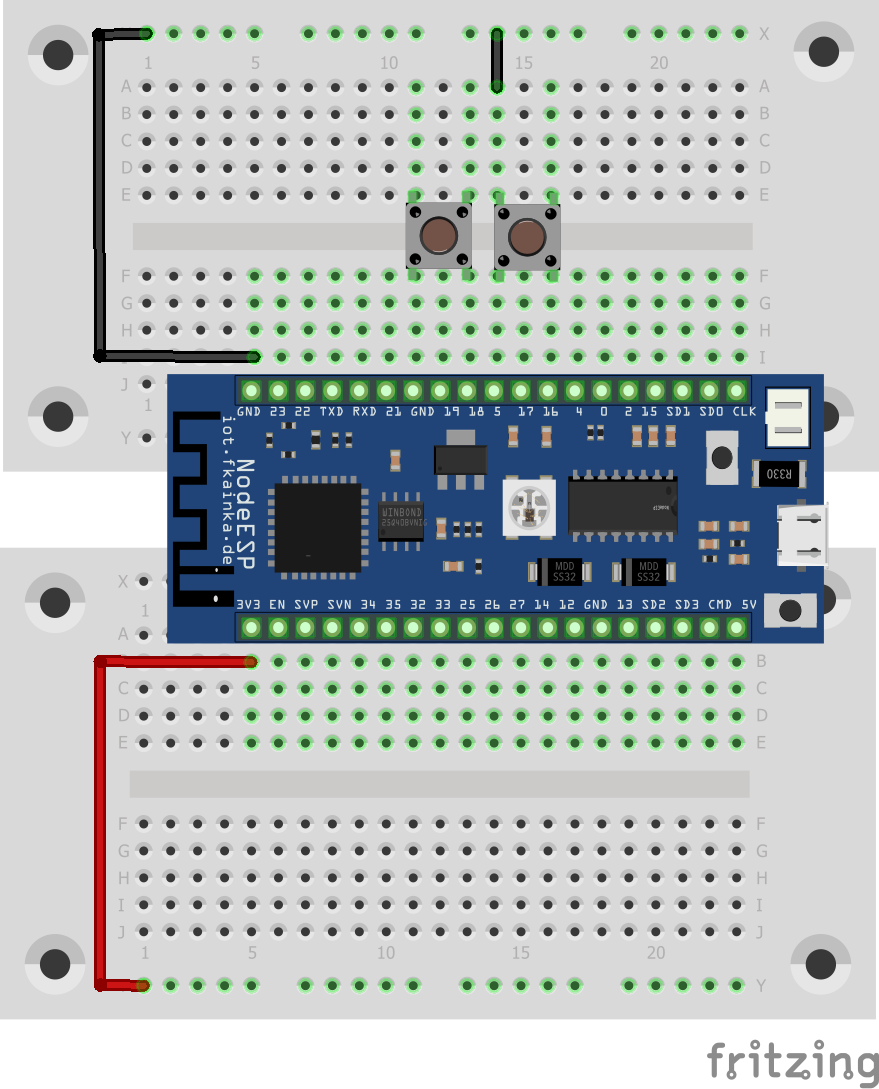
Today we will find again a button hidden behind the door of the Advent calendar. In our experiment today we will continue to cover the MQTT protocol, but this time in conjunction with Node-RED. We will also learn how two…
Read more
Day 11: MQTT
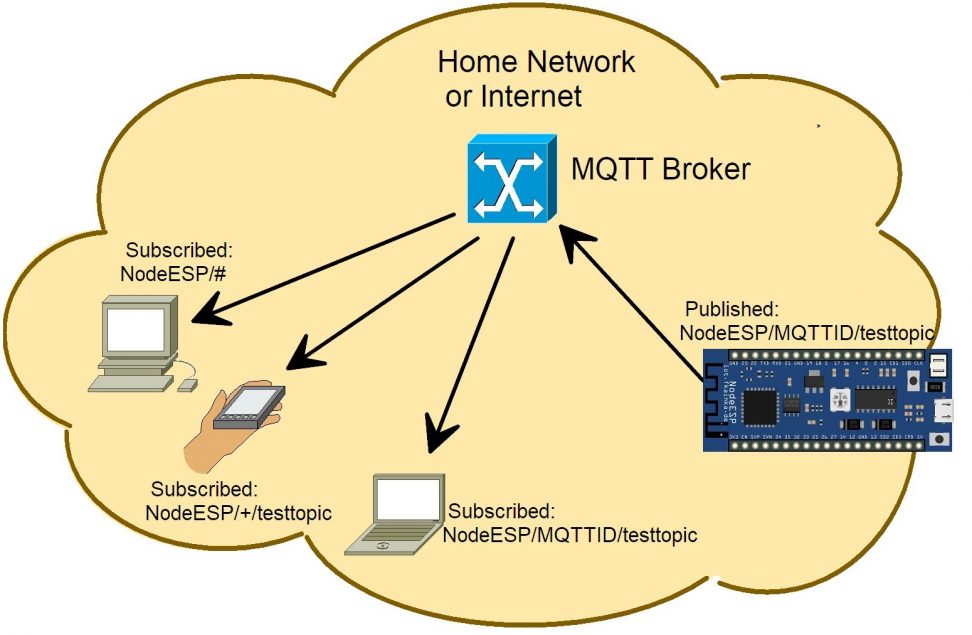
There is a cable set again hidden behind the door today. We will need it in the next few days when the setups become more complex. Over the past few days we have sent most of our data via UDP….
Read more
Day 10: Deep Sleep

There is a battery compartment for three A batteries (4.5 V) hidden behind the door today that will 10. Tag power the board independently of a power outlet. For economical battery operation, we have the deepsleep mode. This mode…
Read more
Day 9: A Mood Light
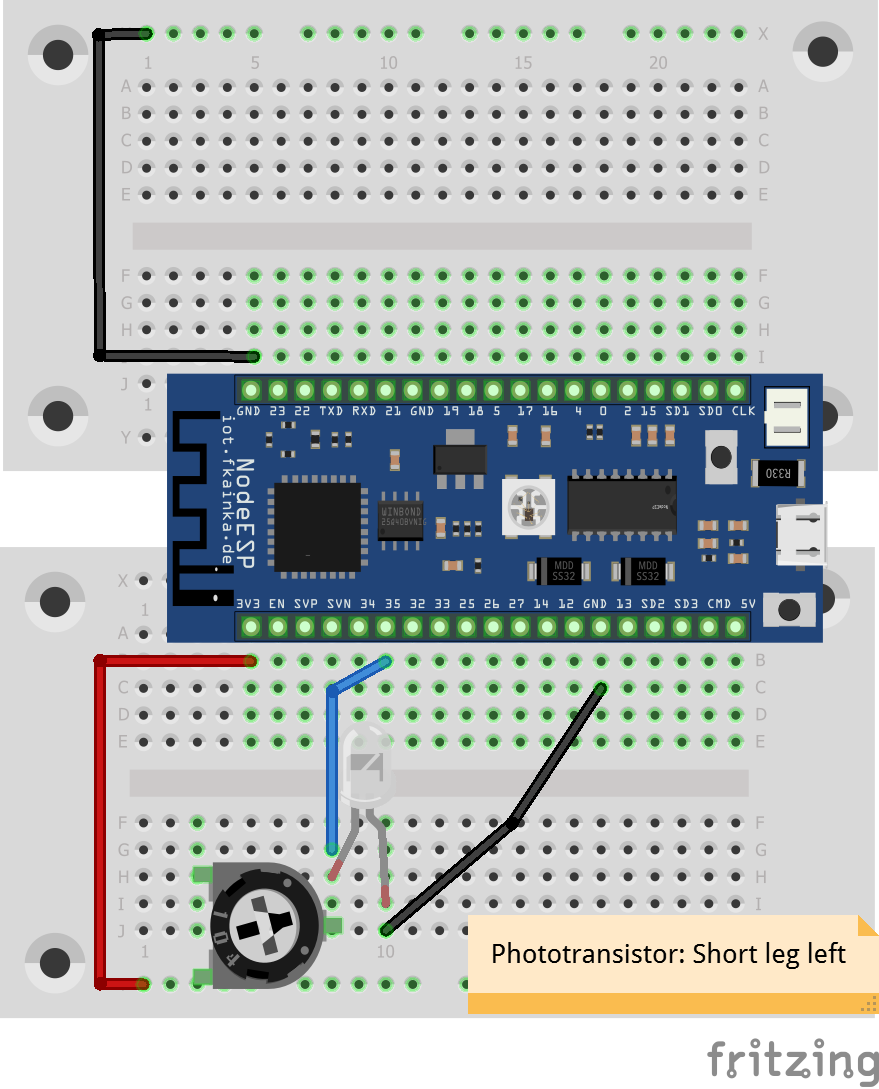
There is a photo transistor hidden behind the door today. We will use it to measure the ambient brightness. The potentiometer is in series with the phototransistor potentiometer in our circuit and you will be able to change the sensor…
Read more
Day 8: A Controller
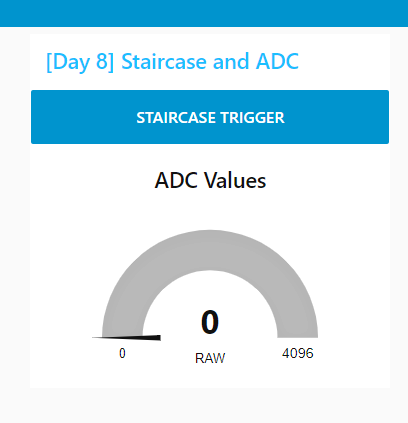
On the eighth day you will find a potentiometer behind the door. We are going to use it as voltage divider. You can set a voltage between 0 V and 3.3 V, which is measured by the board and sent…
Read more
Day 7: Stairway Light
There is a red LED hidden behind the door today. We are going to use this to build a simple stairway light with web interface. We will thus build the following circuit and, of course, activate today’s program. Locate the…
Read more