
 Deutsch
Tag Archive: UDP
Day 7: Analogous sensor
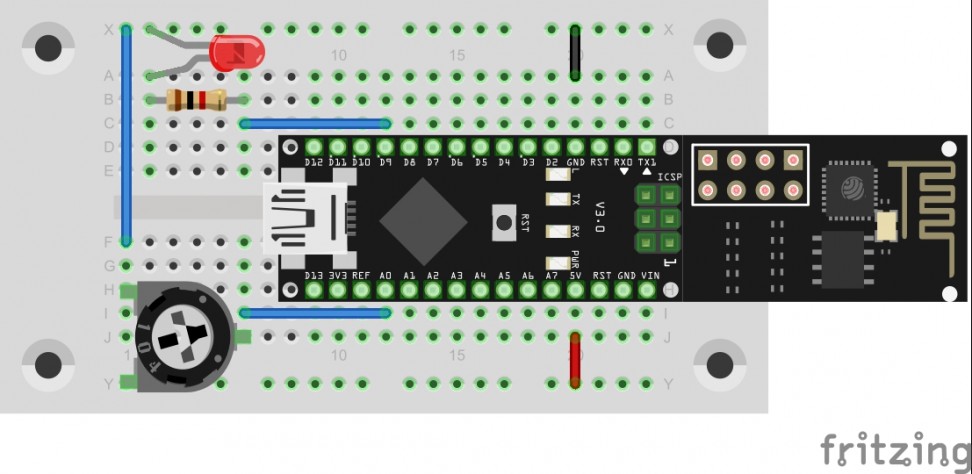
In the last project, a button was used to deal with the simplest form of a sensor. This time, a potentiometer should be used as an analogue sensor to permanently send measured values into the network. Behind the 7th door…
Read more
Day 6: UDP-Button
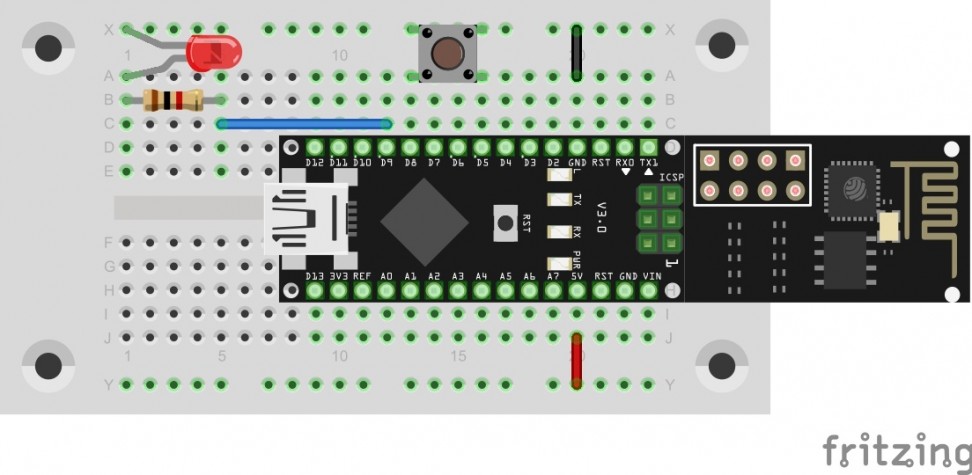
In yesterday’s program, the first commands were evaluated by the controller. Today’s program maintains this function but can also additionally send a command into the network independently. You will find a button behind today’s door. It is used as a…
Read more
Day 4: UDP bidirectional

In yesterday’s project, the UDP communication was tested in one direction, i.e. from the board to the PC. In this program, the module is set so that communication in the other direction is possible as well, almost like in a…
Read more
Day 3: UDP-Send
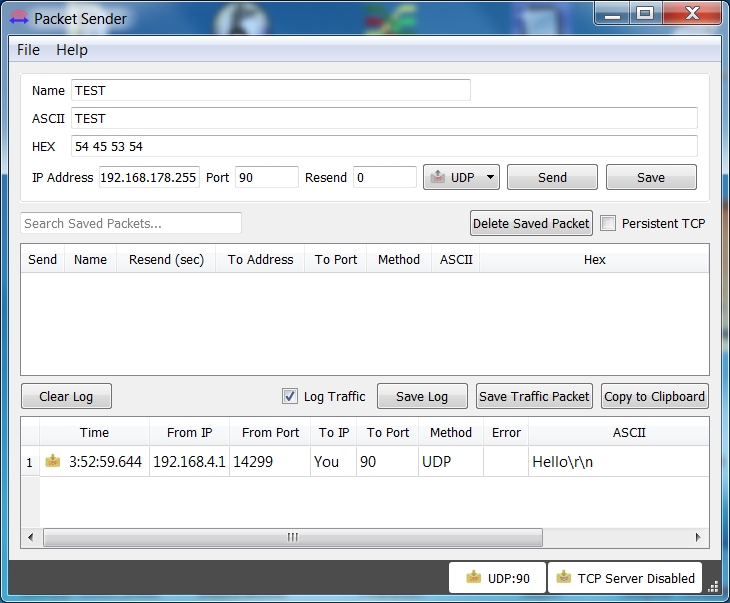
In today’s project, data are exchanged between the board and the PC through the WLAN for the first time. The prerequisite for this is that your computer has a WLAN adapter. The UDP (User Datagram Protocol) is used. Another program…
Read more