
 Deutsch
Tag Archive:
Day 14: Webserver for the RGB-LED
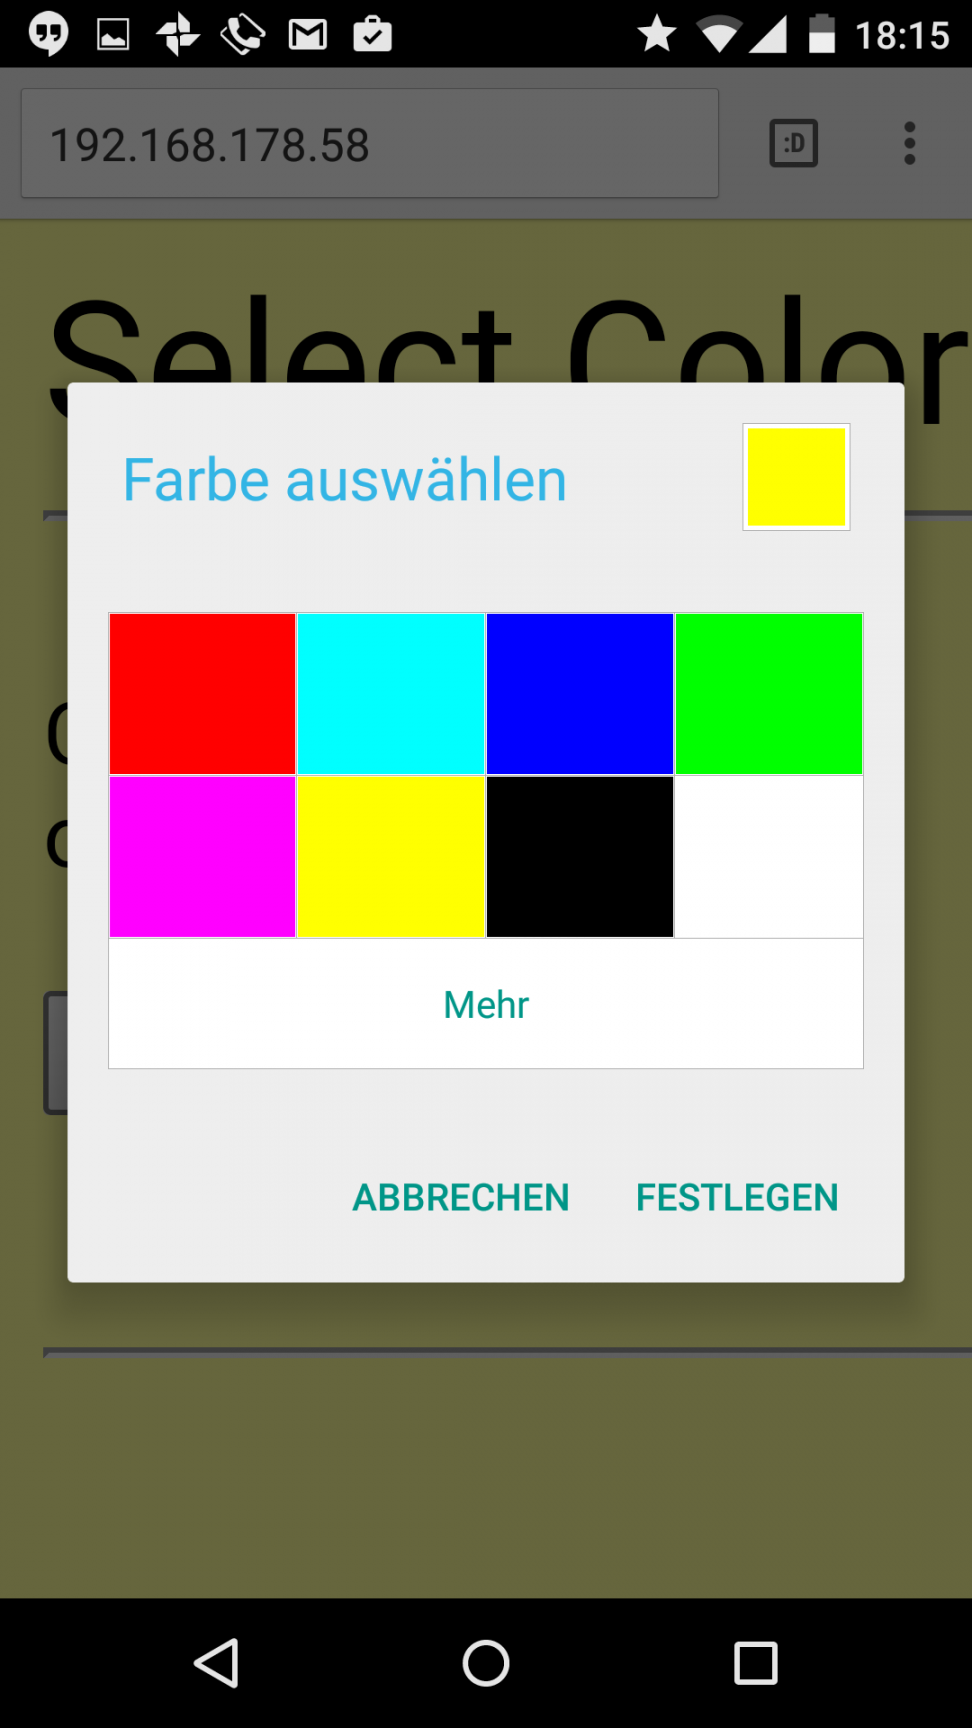
Today’s project is about controlling the RGB-LED by web server. A well-structured interface can be used to change the colour of the LED. The website has also been adjusted and should be easy to display even on Smartphones. Behind today’s…
Read more
Day 13: Website with buttons
In today’s experiment, the illustration of the website is even more sophisticated. There are now also control elements that permit much more comfortable control of the LED. The structure of today’s experiment is no different from yesterday’s: An LED at…
Read more
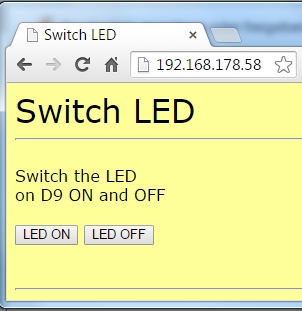
Day 12: Autonomous webserver
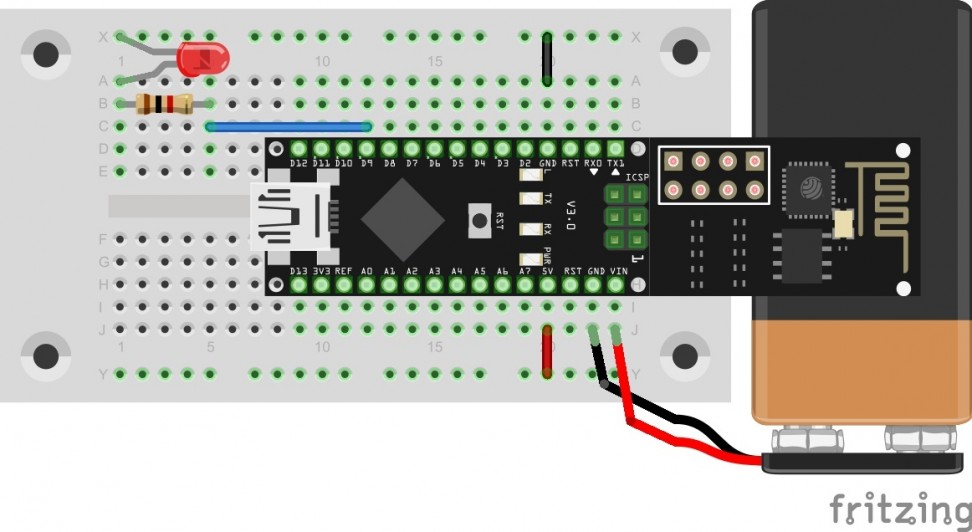
The results of yesterday’s experiment are now to be used in an autonomous program. Today’s program not only sends a simple website to the browser, but also permits control of an LED. Behind today’s door, you will find a 9-V…
Read more
Day 11: TCP-Webserver
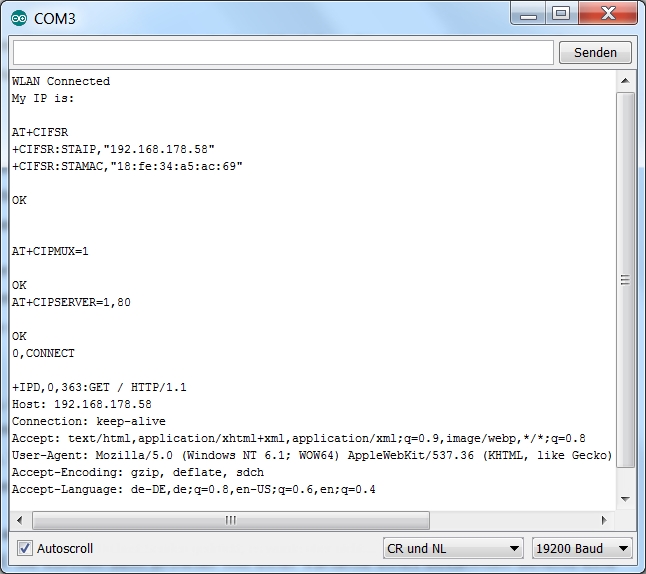
In the previous experiments, we dealt with the subject of TCP and access to web servers a lot. Today, the module is to act as a web server of its own for the first time. Behind the door of the…
Read more
Day 10: Temperature display
Today’s project is an intuitive display of the current temperature. With a single look, you can guess at whether it is sensible to take along a warm jacket. Behind today’s door, there is another LED. This is a special one….
Read more
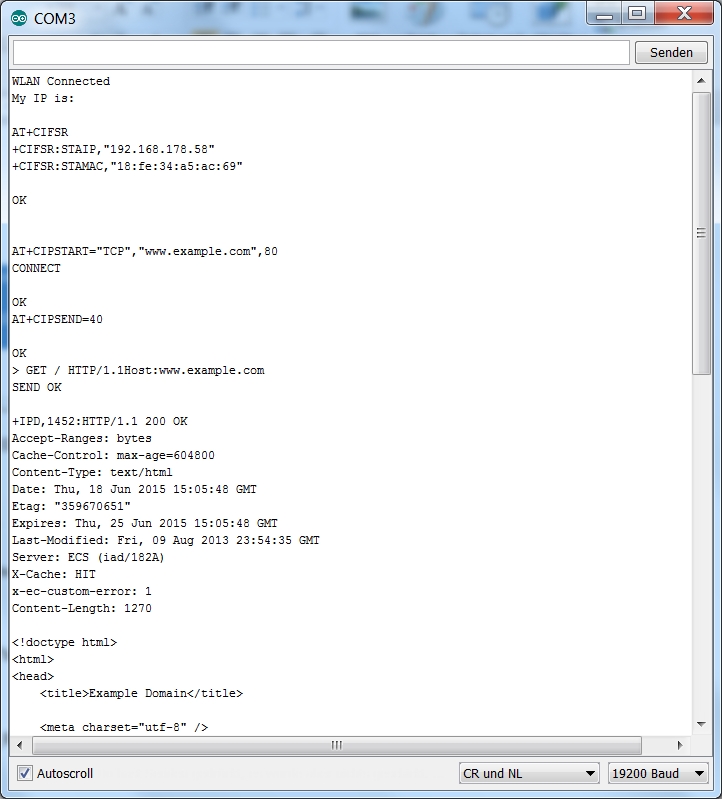
Day 9: TCP time
Today’s project uses the functions of the prior test to independently collect information from a website. The program specifically loads the current time from a dedicated website and thus sets the internal clock of the controller that is implemented by…
Read more
Day 8: A browser
In the last days, we mostly dealt with the UDP protocol with which data can be sent out simply and directly. In the next few days, we will deal with the TCP (Transmission Control Protocol). TCP only permits one connection…
Read more
(Deutsch) Tag 7 (special): Hinweis für Arduino Neulinge – Teil 2

Sorry, this entry is only available in German.
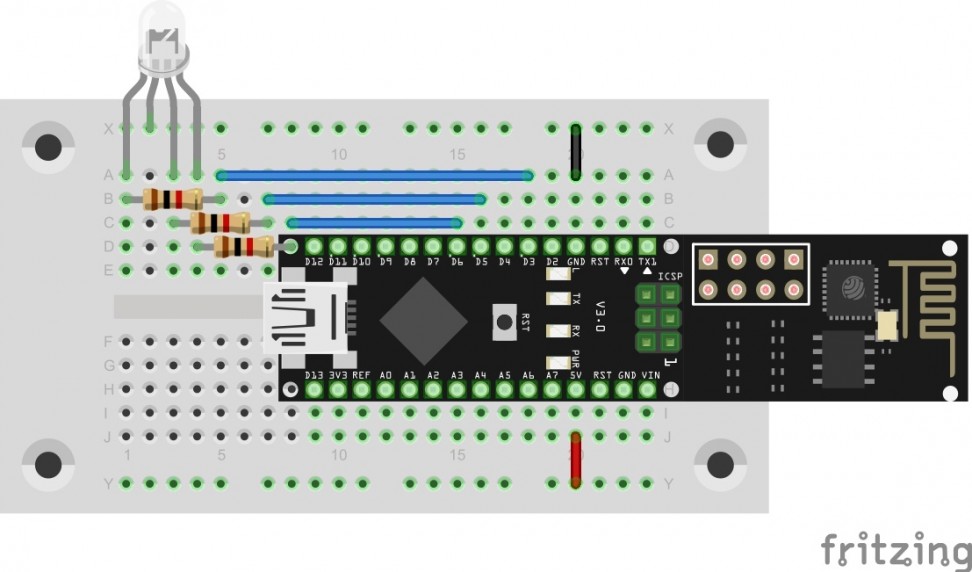
Day 7: Analogous sensor
In the last project, a button was used to deal with the simplest form of a sensor. This time, a potentiometer should be used as an analogue sensor to permanently send measured values into the network. Behind the 7th door…
Read more
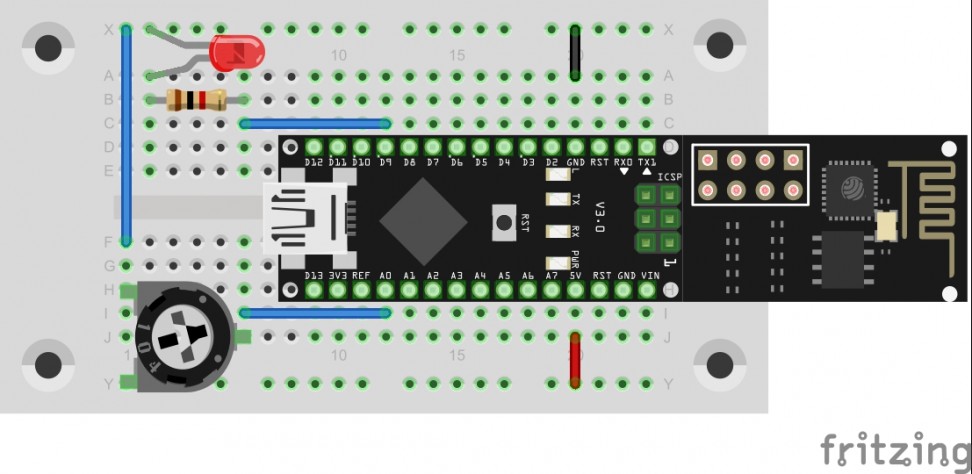
Day 6: UDP-Button
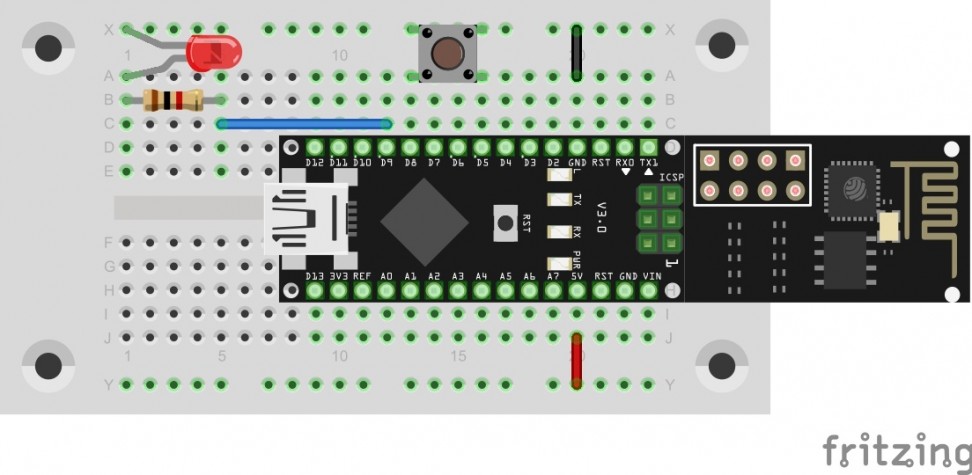
In yesterday’s program, the first commands were evaluated by the controller. Today’s program maintains this function but can also additionally send a command into the network independently. You will find a button behind today’s door. It is used as a…
Read more