
 Deutsch
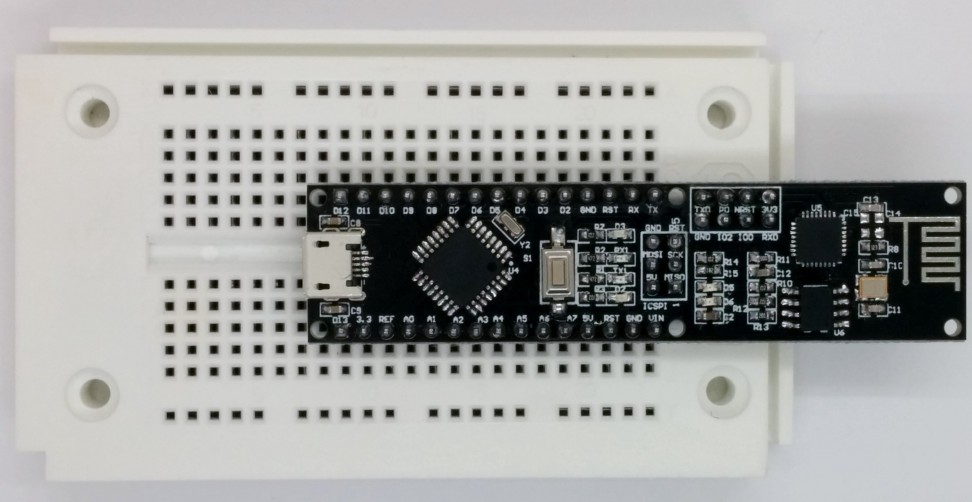
NanoESP
Day 8: A browser
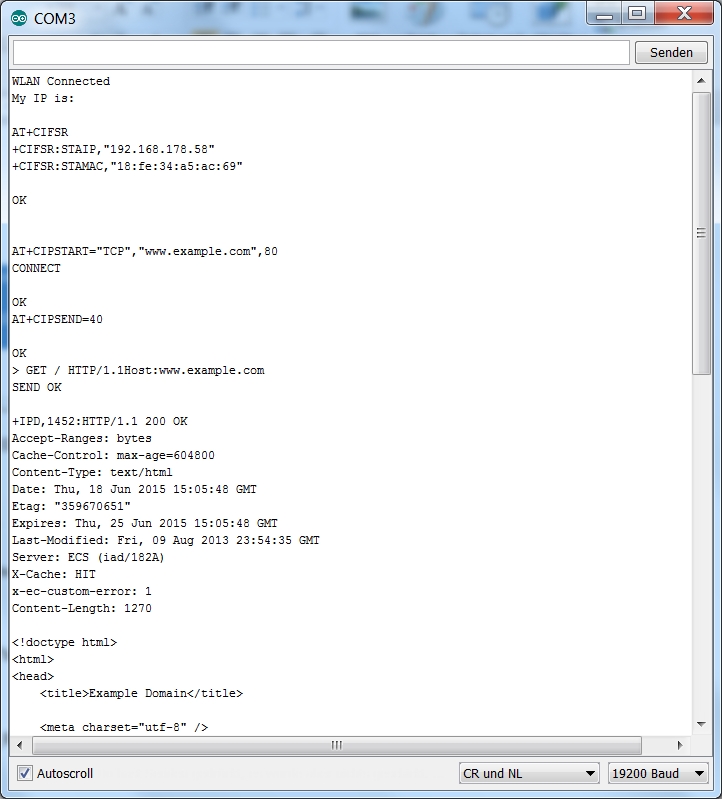
In the last days, we mostly dealt with the UDP protocol with which data can be sent out simply and directly. In the next few days, we will deal with the TCP (Transmission Control Protocol). TCP only permits one connection…
Read more
(Deutsch) Tag 7 (special): Hinweis für Arduino Neulinge – Teil 2

Sorry, this entry is only available in German.
Day 7: Analogous sensor
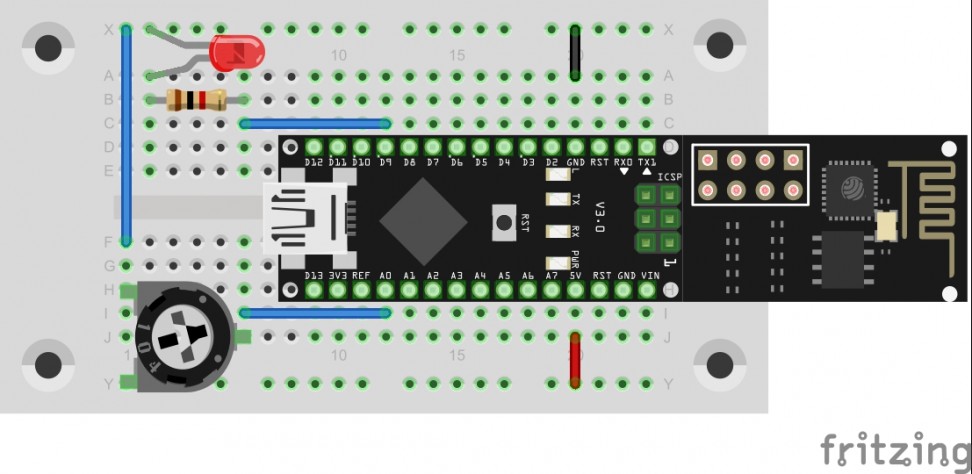
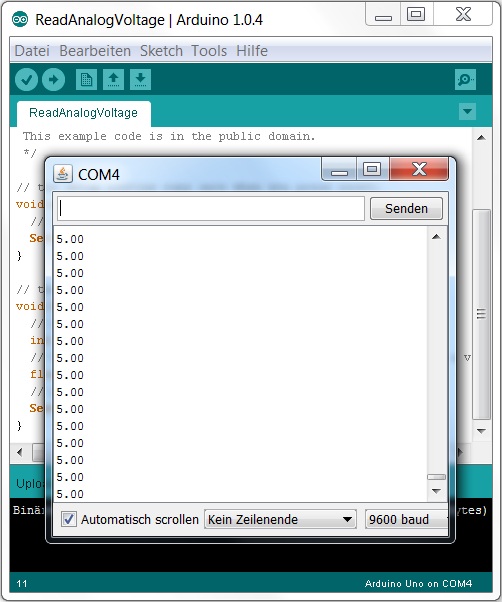
In the last project, a button was used to deal with the simplest form of a sensor. This time, a potentiometer should be used as an analogue sensor to permanently send measured values into the network. Behind the 7th door…
Read more
Day 6: UDP-Button
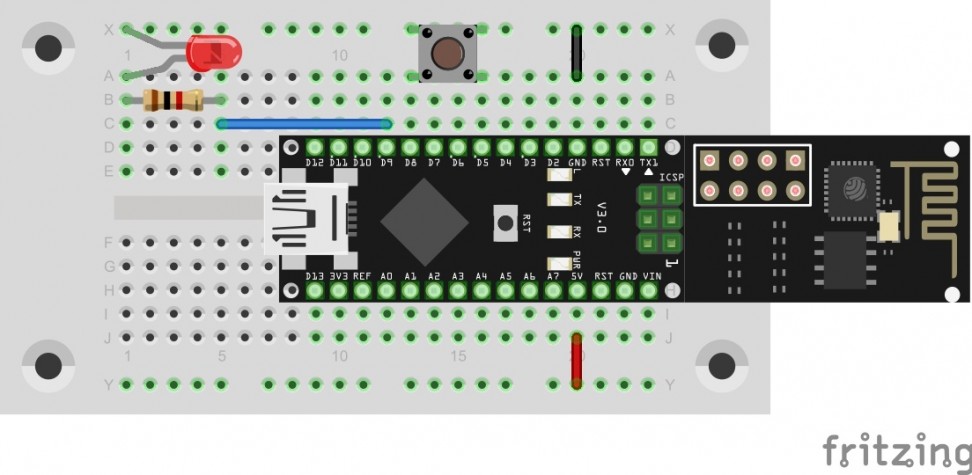
In yesterday’s program, the first commands were evaluated by the controller. Today’s program maintains this function but can also additionally send a command into the network independently. You will find a button behind today’s door. It is used as a…
Read more
(Deutsch) Fritzing Bauteil – NanoESP & Pretzel Board

Sorry, this entry is only available in German.
Day 5: Switching an LED
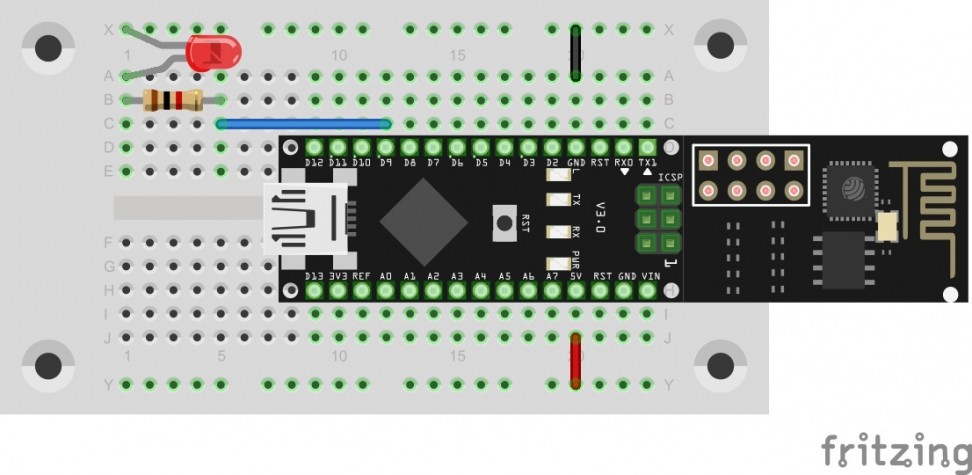
Today’s program is finally about controlling hardware via the UDP protocol. In this case, an LED is switched on and off with simple commands. You will find an LED board behind the fifth door. The right dropping resistor already was…
Read more
Day 4: UDP bidirectional

In yesterday’s project, the UDP communication was tested in one direction, i.e. from the board to the PC. In this program, the module is set so that communication in the other direction is possible as well, almost like in a…
Read more
Day 3: UDP-Send
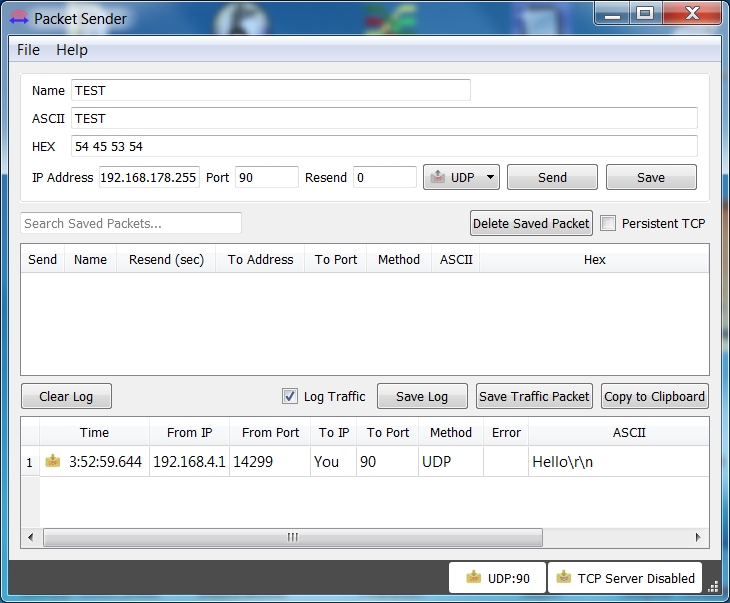
In today’s project, data are exchanged between the board and the PC through the WLAN for the first time. The prerequisite for this is that your computer has a WLAN adapter. The UDP (User Datagram Protocol) is used. Another program…
Read more
Day 2: Google Ping
With today’s project, you test whether you can reach the Google server. This is used as a test of whether there generally is a connection to the Internet or, e.g., a firewall is blocking the NanoESP-board. You will find a…
Read more
(Deutsch) Tag 1 – Hinweis für Arduino Neulinge
Sorry, this entry is only available in German.